When we last met, I showed you how to put a cuff on your doll dresses an easy way. If you missed that post you might want to check it out first. You can see it HERE.
So today let’s finish those sleeves so I can finish Kirsten’s dress! :o) This was where we were last… the cuffs were on the sleeves but they weren’t attached yet.

I’m going to put in the sleeves before I finish off the cuff. Before you go any further, pin your cuff together lining it up so it’s even from one side to another… then make sure both sides of your sleeves are the same length. If you need to, trim them so they are even… sometimes they can shift 1/8th of an Otherwise your sleeve won’t be even when you get ready to sew on your snaps.

If you haven’t already done so, sew 2 rows of basting stitches along the top edge of the sleeves. Make sure you have either cut notches for the center or fold the sleeve in half to find the center. Gather up the sleeve slightly and match up that center notch with the shoulder seam on the dress bodice. Pin in place.

Sometimes if the bodice armhole is too curved, you may need to snip tiny clips just on the curved edge of the armhole to get the sleeve to lay flat. Once you have it pinned at the end and the center, place it on your sewing machine with the sleeve on the top side. Evenly distribute the gathers with the point of a pin or a seam ripper, and stitch from one end of the sleeve to the other, making sure to keep the edge of the sleeve and the edge of the armhole even.


If you have a serger, you can finish off the edges now…

( I really should have shown you this when I making something easier to see, like a solid…sorry about that.)
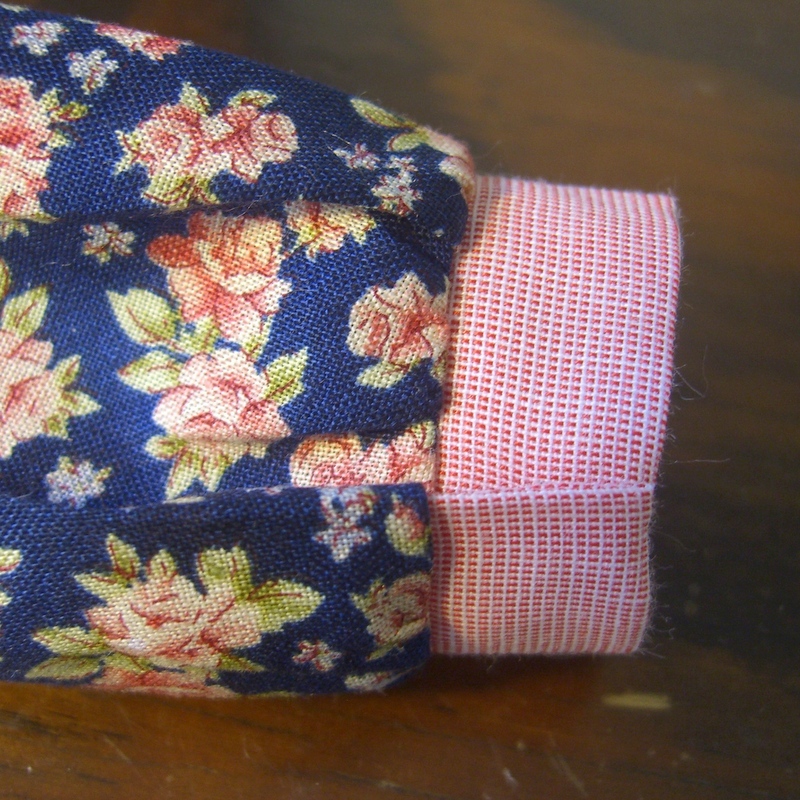
Here is a close up shot of it pressed toward the bodice.

Here’s another shot of it close up…

Once you press it from the underside, turn it over and press it on the right side… making sure not to get any folds in your fabric.

Here is how it looks with both sleeves sewn in…

Now take your sleeves wrong side out and match up the cuffs…

Place a pin about an inch and a half down the sleeve…

Take it to your machine and stitch from that pin all the way down the side seams.

It should look like this:

Take your other sleeve and match it up to the one you just sewed and mark it with a pin in the same place. Sew it the same way.

Press the seams open. If you have a wooden point presser it will be very helpful. If you don’t, you can roll up something like a dishtowel and use that inside your sleeve to press your seams open.

It should look like this…

I take time to tack the seams at the underarms in place…it just takes a few minutes and a few stitches…

Now you can try the bodice with the sleeves in on your doll and mark them at her wrist with a pin where they should come to. Overlap them with the top side of the cuff overlapping the bottom.

Take the dress off the doll and sew the snaps on like this…this is looking at the dress from the front…
If you need some help with sewing on snaps, you can check out this tutorial from me…HERE.

After you have sewn your snaps on the wrists, it should look like this. Try not to catch the fabric from the front side of your cuff, by just barely catching a few threads each time you run your needle through the snap hole.
I added the mid section on Kirsten’s dress and am now ready to gather up her skirt and sew it on…


Well, I better see what else I can get finished on Kirsten’s dress…
See you tomorrow,
Blessings, Jeanne
Terrific tutorial again, Jeanne–that’s just what I do, also! I would add one thing–if it looks like I’m going to have to make some snips in the armscye curve of the bodice, I err on the side of caution and add a row of staystitching just inside the seam line, so I don’t accidentally cut in too far.
I think that dress is going to be really nice on Kirsten! I always think she looks so nice in a blue and pink combination (my Kirsten loves those colors!).
HI Charlotte,
I’m glad to see my way of putting in the sleeves was the same way you do it…yes, the row of stitching is a nice safeguard…
I was looking for a vintage hankie last night to make an apron to go over this dress. I think I found one.
Thanks Charlotte,
Blessings, Jeanne
Good morning, Jeanne! I’m sorry I didn’t get to comment on Saturday’s post, but I thought I would get to it later, then forgot! I don’t do much sewing, so really didn’t have much to say except that you mentioned in the instructions to be sure not to sew over the pins holding the material in place, and I always sew over the pins! I’ve been doing that for over 55 years too! When I bought my one and only Singer, I was given lessons by the store that sold them, a regular Singer store, which I don’t think exist any more. They showed how to use the machine, and then to sew a simple item, can’t remember what it was, but they had pins in, and told me that I could sew right over the pins, and even showed me! I can honestly say that I have never broken a needle yet!
Well, your “insides” look just as good as the “outsides”, so you are sure to get an “A” from me!!
We leave for Branson tomorrow, so I may not get to comment for a few days. We will try the Spring Creek Tearoom too, hopefully!! Thank you for the information!
HI Linda,
I absolutely cannot believe anyone would recommend sewing over needles…you haven’t broken any? Well I’ve broken enough for you and me and probably 10 other people!!
Thanks for the compliments on the inside of Kirsten’s dress…the skirt is on and it’s looking very nice on her.
I hope you and your hubby have a wonderful lunch at the Tea Room…and if you get a chance go next door to the Huckabella boutique shop beside Spring Creek… it has a really nice selection of really pretty ladies and kids things…
Have fun!
Blessings, Jeanne
Even though I don’t sew, I certainly appreciate your skills. Your work is always so neatly done. It’s wonderful that you enjoy sewing but it’s also great that you can mend and restore as well as create needful things. The list is long as to what you can create.
I always marvel at what you can create or mend.
Thank you so much for the compliments on my work, Paula! It’s nice to hear it from those who sew and those who don’t! :o)
I appreciate your kind words.
Blessings, Jeanne
I do like your doll method for sewing cuffs. Not sure if I can ween myself from the human way though after 56 years of sewing. Everything looks so nicely finished. One question. Why do you press the sleeve towards the bodice rather than the human way of the sleeve seam towards the cuff? Know there must be a reason.
And I’m with Linda. Been sewing over pins forever. Only broken a couple of needles in all of those years. Maybe the new machines can’t handle it.
Meadow Dolls has a new sculpt, Kyrra, debuting at the doll show in France. She has a slightly crooked smile and is of course adorable. Preorders next year. 🙂
HI Joy,
I’m glad you enjoyed seeing how I put on the cuffs and then added the sleeves..
A lot of the Civil War dresses had decorative stitching around the armhole and pressing the seam toward the bodice allowed you to catch that stitching and hold it down. Most Civil War and colonial dresses had very fitted sleeves and pressing them toward the bodice gives that much flatter look.
I do sometimes press the gathered sleeve toward the sleeve when it’s a very full gatheted sleeve. When I add netting to a sleeve as a sleeve header, I press them toward the sleeve.
When making something tailored like a suit, you press the seam allowance toward the sleeve to give your sleeve that rounded look.
Well you and Linda must be very fortunate…I’ve certainly broken my fair share of needless over the years…on old and newer machines!!!
Thanks Joy,
Blessings, Jeanne
Fantastic tutorial. It is how I do cuffs as that is I was taught in tailoring school. It just looks professional and neater and often easier in the end.
Like Linda said I always sew over pins and having doing so for 61 years, give or take. I have never broken nor bend a needle and it is how my grandmother taught me to sew. I guess we all have our ways when it comes to doing things and old habits are hard to break.
So far the dress is looking so pretty and I love the micro plaid you used for the neck and cuffs.
HI Sandra,
Well, apparently I am in the minority as far as breaking needles go…because I’ve been hit in face or the fingers from shattered needles.
I use a lot of 9 and 11 size needles…maybe you all are using 14’s? Just a thought.
I’m glad you are liking Kirsten’s dress so far…. just wait… :o)
Thanks Sandra,
Blessings, Jeanne
Yes, Jeanne. I have been using #14 needles most all the time. I actually had to go looking in my sewing cabinet to see if I had extra needles and what size they were. I did, and they were #14. I hardly ever change my needles out because they never break! Now, that’s just me, I don’t know about anyone else.
I’m with you Linda. Rarely change needles. I know the machine people say to change needles very often. Well, I don’t and doesn’t seem to make any difference. Needles I’ve been using, 12’s and 14’s. 🙂
I enjoyed your tutorials, both this one and the previous. I had a busy weekend so I didn’t get to comment on the other. I’m about to start an adorable dress for my LD Claire. I haven’t sewn anything in a while, been machine embroidering tons of things instead, and am anxious to get started this morning. I’m going to make the same dress for my LD Fallon. I love seeing the same pattern in different fabrics and embellishments, one will have piping at the seam where the bottom ruffle meets the bottom of the dress and one will have lace there, both match the fabric that will be on the cuffs and pocket of the dresses. I have a problem, often, getting started on a project because it takes time to pick out the pattern, go through my huge fabric and embellishment stash and get everything together. I saw in one of my sewing magazines where a woman arranges everything for several projects ahead of time, puts each project and all its accoutrements in a ziplock bag (different sizes for different size projects) and then hangs them on pants hangers in a closet. So I took a couple days last week and picked all the patterns, fabrics and embellishments for the lucky recipients of the new wearing attire. It totally frees up my mind for the actual sewing and knowing I have my next project lined up will keep me moving forward. Once I finish the current line-up (I have eight in line), I will repeat the process of pick-and-choose.
HI Barbara,
Congrats on getting so organized before you ever begin sewing. I know what you mean about it taking time to pick things out. Sometimes I honestly think I could make a dress in the time it takes me to pick out the fabric and the lace.
I hope this new way of gathering things and putting them together will help you get more sewing done. I think it will!
Let us know if it does!
Thanks Barbara,
Blessings, Jeanne
Hi Barbara, thank you for passing on the tip regarding pre-project planning. I also get overwhelmed about picking everything out and I am definitely going to give this a try.
Good luck on your projects.
HI, Jeanne & All! ~
Words cannot adequately express the sheer JOY I feel upon having had the winning bid for my “Ten Ping Mia’s” new “Picture Day” outfit, made by the FINEST of all doll couturiers, namely YOU, Jeanne!!!
Although I do not sew (except for “mending”), I REALLY APPRECIATE the sewing tips you share with us on this blog. Your care, precision, finesse, & expertise SHINES in EVERYTHING you do, Jeanne. Due to hectic “Life things” intervening, I may read some of your posts WAY after they are posted, but I relish, savor, & save them all.
“We” cannot wait for the NEXT “Ten Ping Mia” or “Gigi” outfit (or maybe “something special” for 11-inch articulated “Leeann”, by Denis Bastien…hint, HINT!)
Doll-Lightfully yours! ~
Cheryl in NJ (but lately in the Lower Hudson Valley of NY)
Congratulations! You are now the proud owner of a totally adorable outfit. If I had a Ten Ping I would have put in a bid myself. Enjoy!
Thank you Barbara…
Blessings, Jeanne
THANK YOU for the “congrats”, Barbara! I’m “kinda” glad you don’t have a “Ten Ping”: LESS competition!
Happy dolling! ~
Cheryl in NJ
Congratulations, Cheryl! You will treasure that darling outfit because it is a work of art, and because it is a one of a kind from a wonderful seamstress!
Thank you too, Linda!
Blessimgs, Jeanne
THANKS, Linda, for the congratulations. I WILL treasure this outfit (as I treasure a couple other of Jeanne’s outfits!). You said it: Jeanne’s outfits ARE works of art, ’cause she IS a VERY TALENTED seamstress & doll couturier!!!
Have a DOLL-lightful day! ~
Cheryl in NJ
HI Cheryl,
I’m so glad to see you excited about winning Ten Ping’s dress set. I mailed it from the PO this morning, so in a few days you can have your girls fight over who gets to wear it first!
Thank you too, for the kind words you shared about my sewing! I appreciate them…
Blessings, Jeanne
Jeanne ~
“Excited” is an UNDERSTATEMENT! “Ten Ping Mia”, “Gigi”, & I are EAGERLY anticipating the arrival of this MARVELOUS outfit! THANK YOU SO MUCH for sending it out to us so promptly! “We” are DOLL-lighted” & HONORED to have been the winners!
BESTEST dolly regards! ~
Cheryl in NJ/NY
Thanks for part two of the sleeve tutorial. Every little detail looks neat,tidy and professional.
Looking forward to seeing the hankie details.
I sew over pins too, ( for about 63 years) unless it is very thin fabric which catches the pin easier for some reason…the thicker or number of layers makes a difference and the needle size . Only one time did I dead center the pin and it bent like a “V” and got stuck near the bobbin case. I thought it was the sewing fairy telling me it was time to pop out the bobbin area and clean and oil it. :0)
Fun to see what seamstresses actually do .
Off the subject but I saw a mans shirt at Kohls yesterday made from a big checked fleece and thought how comfy it would be for hubby…I almost fell over. It was 75.00! Chaps is his fav brand but it made me want to sew for him again..for sure it would be about 10.00 or less. Now that’s worth my time:0) I may try making it for Christmas…if I can find my old pattern
?
HI Kathie,
So you’re a pin-sewer-over too? Ladies, ladies, ladies!!! :o)
Well, from the responses from today’s post…it appears I am in a club all my own when it comes to removing the pins before sewing over them… most everyone seems to stitch over them….oh well…it’s okay…I guess, but I’ll be waiting to hear from the first person who breaks a needle doing it.
Well, if you make that fleece shirt for your hubby, we want to see it…for “inspiration” you know!!
Thanks Kathie,
Blessings, Jeanne
Hi Jeanne. Lovely work as always. The sleeves and the cuffs are nice tutorials. I especially like the handwork you are doing to tack the seams in place. It’s those extra touches that make such a difference.
Thank you Carolyn,
Some of my 4H days and sewing tips from the judges have stayed with me for decades!!! The extras are why I can’t churn things out like some ladies can…time does matter…
Thanks so much,
Blessings, Jeanne
Thanks for the tutorial and the info regarding ironing the seam in the different directions-very helpful. I sew over the pins too however I have hit a couple dead center making the V shaped pin. Maybe it is the sewing fairy saying clean your bobbin area. LOL The dress is coming along nicely and I can’t wait to see the hanky apron. Thanks for sharing your wonderful skills.
HI Carole,
I’m so glad you enjoyed the tutorial and hope you learned something new! That’s always my goal when doing a tutorial.
I managed to get the cap finished but not the apron…maybe tomorrow… today was too busy for much sewing.
Thanks Carole,
Blessings, Jeanne
Hi Jeanne,
Many thanks for part 2. You really do a wonderful job explaining all the steps and the photos really help – Thanks again.
I too have to sheepishly admit to sewing over pins and yes I have broken a needle or 2. Old habits die hard so I probably will continue…
HI Leigh,
I’m glad you enjoyed the tutorials and hope you learned something.
Oh no!!! Another lady who sews very her pins…what can I say?
I am flabbergasted…. :o)
But everyone…keep on sewing!
Blessings, Jeanne
Bonsoir Jeanne !
Do u know what I did this afternoon ? …. I cut some fabrics to sew a New dress for My Little Darling. And of course à New dress with long sleeves ! I’m going to follow your lesson on how to sew the sleeves. Hope to show you soon the result ! Thanks for all.